Showing posts with label GIMP. Show all posts

Saturday, November 05, 2022

Spinning Globes and Amazing Circles


I've noticed an interest in my old spinning globe post. Today, I relearned how to make them. That led me to amazing circles and relearning how to make them. The results are not as good as I used to be able to make, but it is a beginning for something to do in the winter. If it ever comes. I have put some links here if you are interested in them, also. You need GIMP (free) for the globes and Photoshop Elements (not free but my version is 11 which is very old) for the amazing circles. I'm pretty sure you can use GIMP for the circles, too. These globes and circles really are not of much use, but are fun to create and pretty to look at.

The top globe was created from this white trillium photo below.

White trillium


Musk mallow spinning globe from 15 years ago.


For the GIMP spinning globe, I followed this video. Do it exactly as it shows, especially the file type at the end of the file name. 


This winter I will play with getting rid of the seam in the globes, as chatted about here:

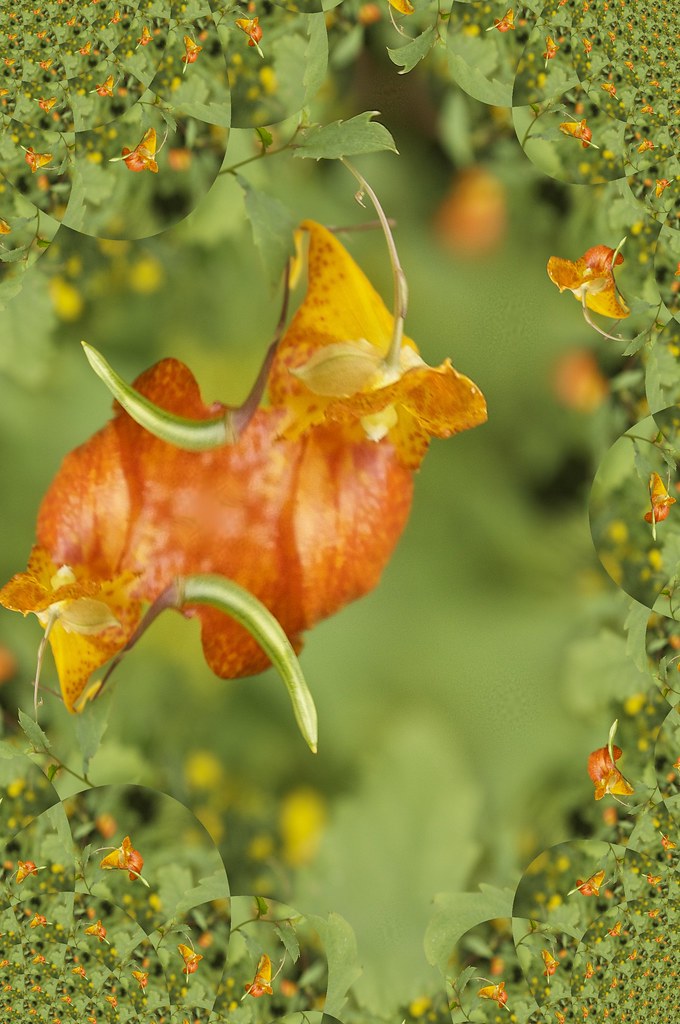
An amazing circle made today from musk mallow photo.

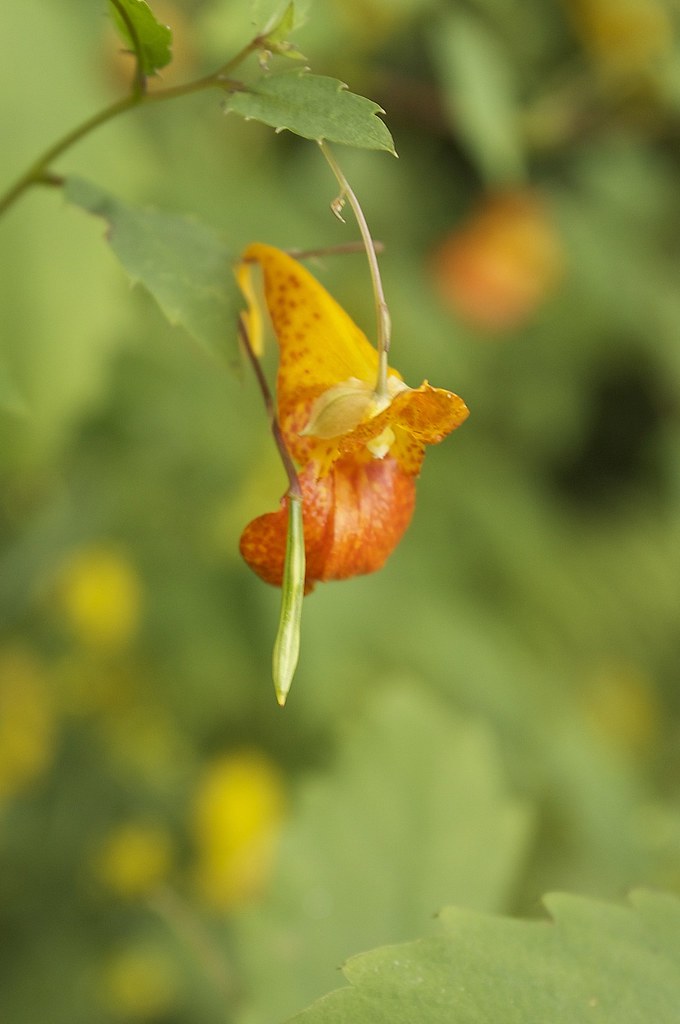
The original musk mallow photo.

For the amazing circles in Elements, I decided to cut and paste the instructions from the Amusives blog:
The technique for making Amazing Circles is similar to above.

a. Enhance the photo as desired. 
b. Choose the Crop Tool (looks like a knife, sort of). Select a Fixed Aspect ratio of 1:1 and select the area you want to use. 
c. From the menu bar, choose Filters- Distorts- Polar Coordinates. Uncheck the “To Polar” button. Okay. 
d. From the menu bar, choose Image- Transform- Flip Vertically. 
e. From the menu bar, choose Filters- Distorts- Polar Coordinates again. Check the “To Polar” button. OK. 
f. The resulting circle may not have the background color you desire. Use the Color Picker Tool to select a color from the image. Then use the Paint Bucket Tool to fill the background.

I hope this helps those of you who are interested and have to fill a long, boring winter with something. If there are any questions, I'll see them in the comments and do my best to help.

_/\_/\_


Thursday, February 18, 2010

Friday Fractal: Fractal Trace on GIMP

I think it was a mistake for me to begin learning fractal software on Windows in February. The weather is great and I should be outside doing all sorts of stuff. But here I am playing fractals. I saw a reference to using a fractal trace filter on GIMP so of course I immediately had to sit down and play with it. Above is a photograph of jewelweed (also called spotted touch-me-not) taken on our Butterfield Pond hike in August. I used the map filter fractal trace and obtained the image below. I like the self-similar frame created by the filter.

I then chose another jewelweed photo and used the filter again:

Clicking on any of these images will open a new browser window and display a large photograph.

And finally I chose one of my favorite sunflower photographs:


I accepted the default settings for the filter on each of these photographs. There is a snowstorm coming next week (hopefully) so I will spend the snow day playing with the filter and other fractals some more. I find these GIMP and Photoshop filters to be a good way to enhance poor quality photographs (the second original jewelweed photo is not my best) and turn them into something interesting.


Technorati Tags: Del.icio.us Tags: Flickr Tags:

diigo it
_/\_/\_

Saturday, July 28, 2007

Tips For GIMP Spinning Globes

Please note: I cannot find the Script-Fu package for you to download right now. Perhaps you can. Perhaps it comes with GIMP and I have completely forgotten!

I had several people ask me for more details about these spinning globes. I don't know anything about Photoshop but I bet you could make them there. I used Skitch to make the image with my name on it and GIMP to make the globe. For brevity, I will assume that you can figure out how to use GIMP. You will also need Script-Fu scripts. Install them in GIMP. And please remember that I am learning all of this myself. I only am giving you the tips that I have learned. I am not telling you that my way is the only way (my way is probably the crookedest way!). Today I found the GIMP wiki and it seems to have a lot of basic information that I need to learn.

On a Mac? Go here for more GIMP info. MAC OS X users: you need to install the X11 windowing protocol which is available at Apple. If I could do it, you can, too. Just e-mail or scream for help. (Or buy MacGIMP on CD and it'll do all that for you. I'm about at the point of doing that myself.)

On Windows? Go here.

Are you really serious about GIMP? Join GUG (GIMP Users Group). Join the Flickr GIMP Users group. They have lots of help in the discussions but you cannot read the discussions unless you join the group.

Now that you are all set up and running GIMP with Script-Fu, open a window or tab with THIS PAGE. The directions there are perfect, almost.

TIP: Scale your image to 1:1 (a square). Square images make spheres, rectangular images make oblate spheroids.
This is the image that I used for these globes:

Experiment with the smallest size image you can tolerate. I went down to 170x170 (px) and after uploading "small" versions in Blogger my yellow spheres are the size you see here. I heard the comments on my first spinning globe: it makes people nuts! So the smaller the better. It made me nuts, I can't even tolerate having my blog page open now. I have to add a few blog posts to push the spinning off my screen.

Play with the direction that you want your globe to spin. I think text is better going right to left instead of the default left to right.

If you use a photograph, you will get a seam in your globe. If you create a graphic image as I did here, without borders, you won't have a seam.

The instructions for saving in the tutorial Spinning Globe link seem to be off a bit (or perhaps it is different for a Mac). This is how I save my gif image after it has been optimized and after I have played it back to make sure it is what I want:

Hit control/shift/S: a dialog box opens. Type in the name of your image and add the .gif suffix. Select the folder that you want to save it to and hit OK or Enter or whatever it says. Then follow the tutorial directions again.

I set the spin rate at 15 for these yellow globes and you can see how fast they are spinning! In fact, I wanted to see if they are any slower than the 100, 200, and 300 ones I have made but I have not checked that out.


Blogger will host animated gifs but they won't animate! You need to host your stuff elsewhere, like ImageShack. You will probably have to play with the size that you import. I imported my yellow globes as "small."

That is all I have at the moment. I will be revising this again tomorrow when I have more energy and am thinking more clearly. Don't stay up all night making these like I did. You will pay dearly for it tomorrow.

Technorati tags:

_/\_/\_

Photo Hunters: Creative

A Spinning Globe Made Using GIMP


Learn how to make your own here. I used my photo of a pink musk mallow bloom to make this animated gif. Be sure to e-mail me or leave a comment if you want further instructions! In the morning I will update this post with exact instructions but it is now 3 AM. Happy Photo Hunting!

_/\_/\_