Showing posts with label recipes. Show all posts

Monday, August 14, 2023

My Pizza

Finally!

I have perfected my pizza recipe. I use three recipes that I have adapted for what I like. I have used hamburger as a topping, and here, thin slices of fresh tomato lightly dusted with dry basil. The crust is thick and soft, the sauce is tangy and thick, and it takes an entire two cups of shredded mozzarella. The recipes makes enough pizza for three or four meals with leftovers for breakfast, which is very important. It takes perhaps an hour to make and bake, which is also important. The sauce is no-cook.  I overcame the salt and crust problem that I have posted about before. This took years of finding the perfect ingredients, seasonings, recipes, and a pan the perfect size for the crust. It is just the way that I love pizza.  ๐Ÿ‘ผ


Sauce

In blender or food processor:
14.5-ounce can no-salt diced tomatoes, undrained
6-ounce can tomato paste
¼ of a small onion but the more the better
2 large garlic cloves (I use a spoon from the drawer and just scoop out a lot of chopped garlic from a jar)
1 heaping tablespoon King Arthur Flour pizza seasoning
1 teaspoon granulated sugar

Blend, or use food processor, until this is thick and smooth.

Crust

1 cup warm water (110°F/45°C)
1 tablespoon white sugar
2 1/4 teaspoons active dry or instant yeast (which is one envelope)
3 tablespoons olive oil
1 teaspoon non-iodized table salt
2 1/2 cups all-purpose flour

Directions

Stir water, sugar and yeast together until dissolved. Add the olive oil and the salt. Stir in the flour until well blended. Let dough rest for 10 minutes. But if you use instant yeast, just toss everything in a stand mixer and, using dough hook, let it run.

Mist the pan lightly with olive oil. Gently flatten the dough in the pan and turn it over so both sides are coated with the oil. Pat dough into pan using fingers dipped in olive oil. If the dough doesn't retain its shape, let it rest 15 or more minutes. If desired sprinkle basil, thyme or other seasonings on crust. Top with your favorite pizza toppings and bake for 15 to 20 minutes in a preheated 425°F (220°C) oven, turning 180° halfway through the bake. Check the bottom of your crust before taking out of oven.

Do not put KAF seasoning on top of the pizza: it is too salty.

Special stuff

By the way, I didn't qualify for Amazon Associates, so none of these products are affiliated with anybody except me.

USA Pan jelly roll pan 14.25 x 9.37 x 0.5 inches

Awesomely good but be careful with salt levels!

Because of my hands, I don't chop garlic anymore.
This brand is simply what our village store carries.

Original recipes

KAF Pizza Seasoning

Saturday is always pizza night now! I will be playing with toppings from now on. And baking desserts.  
๐Ÿ•๐Ÿ˜€๐Ÿ•
_/\_/\_

Monday, February 13, 2012

Preserving

Spaghetti Sauce for Winter-2.jpg
Spaghetti Sauce

Our first garden in Vermont was successful. Before the blight hit in September, we got enough tomatoes to can quarts of spaghetti sauce and tomatoes. We had over a couple of hundred pounds of cucumbers and made sweet relish, bread and butter pickles and dill pickles.

Making Pickles-1.jpg
Making pickles.

With all of the apples and chokecherries, John made apple, cherry, and apple-cherry jelly.

Making Jelly-1.jpg

Making Jelly-5.jpg

Making Jelly-2.jpg

John had planted a lot of squash seeds that he brought from New Hampshire. The trouble was, he had no idea what they were. They turned out to be Red Kuri squash, which I now like better than butternut. It is sweeter and more solid than butternut. It makes terrific pies. John processed and froze so much squash that we had to get another huge chest freezer!

Red Kuri Squash-2.jpg
Red Kuri squash on the vine.

Drone Fly (Eristalis tenax)-1.jpg
A Drone Fly (Eristalis tenax) on a squash leaf.

Bee in Squash-9.jpg
Bumblebees would often pile up six deep in a squash blossom.

I never did take photos of the apple sauce, apples, pies and cider that John preserved. But I do know that he made over 20 gallons of cider! It was a very fruitful harvest!

_/\_/\_

Sunday, February 05, 2012

Puffballs for Supper

Giant Puffball Mushroom (Calvatia gigantea)-7.jpg
Giant Puffball Mushroom (Calvatia gigantea)

I can't tell you where because it's a secret that we will keep, but in late August we found a small stand of giant puffball mushrooms. These are one of John's favorites, so he happily picked them for supper that night.

Giant Puffball Mushroom (Calvatia gigantea)-8.jpg
I've seen photos of these bigger than basketballs!

When we returned home, John thinly sliced his 'rooms and melted a quarter pound of butter on the stove. He fried the puffball slices and soon had a full tummy!

Giant Puffball Mushroom (Calvatia gigantea)-12.jpg

I tried a slice but my refined, junk food city girl taste buds found the mushroom too earthy and tasteless. Maybe next year I'll be able to choke some down.

Giant Puffball Mushroom (Calvatia gigantea)-19.jpg

_/\_/\_

Saturday, November 26, 2011

Review: Our Thanksgiving Dinner

Corn Casserole-1.jpg
Corn Casserole
★★★★★
The recipe is here. John likes it hot and cold, I only like it hot.

Apple Pie from our trees-1.jpg
John's apple pie from our apples
★★★★★
Sorry but there is no recipe; John wrote it himself.
The best pie ever and it is all I ever want in life.

Pie Crust Rolls-1.jpg
Pie crust pinwheels
★★
I flavored them with maple sugar cinnamon but forgot the butter and cooked them too long.
Not enough cinnamon and so dry they almost killed me.

Yvette's Pickled Beets-1.jpg
Yvette's Pickled Beets
★★★★★
The best I have ever tasted. Delicate flavors with the pickled tang.
Bought at E.M. Brown
Pickled In Vermont:  yvette.beaudry@gmail.com

My cranberry sauce-1.jpg
My cranberry sauce
★★★★★
Same old great recipe and the berries were good this year.

Squash Pie from Our Red Kuri Squash-1.jpg
Squash Pie
★★★★★
Made with our Red Kuri squash from the garden.
Note to self: decrease brown sugar for this sweet squash. Recipe here.

Turkey (cooked the day before, which was the best thing we have ever done), stuffing, potatoes
★★★★★
Note to self: Be sure to do the same next year. Or maybe at Christmas!

_/\_/\_

Monday, August 22, 2011

[Cross-Post] Making Pickles

Making Bread & Butter Pickles-2.jpg

We have dozens of wonderful cucumbers from the garden this summer. John made 6 pints of relish (the recipe will come later), and today we made pickles. The photos are my own from when we made the pickles using this recipe. The recipe can be found at http://www.bonappetit.com/recipes/2011/08/bread-and-butter-pickles. We tasted the pickle juice after we finished canning the pickles. It was wonderful, with a great “bite.” We can’t taste the pickles for one week.This post is from my recipe blog: http://meeyauw-recipes.blogspot.com/2011/08/bon-appetit-bread-and-butter-pickles.html. All text in italics is mine. Non-italic text is copied from the Bon Appetite post. We doubled the recipe and used pint jars. This was a great day — John and I cooked together while violent thunderstorms raged outside!

These old-school sandwich pickles strike the perfect sweet-sour balance.

MAKES ABOUT 2 QUARTS

RECIPE BY Kevin West

AUGUST 2011

Making Bread & Butter Pickles-3.jpg
John has made a knife that uniformly cuts 1/4 inch slices,
which was perfect for the cucumbers.

INGREDIENTS
  • 2 1/2 pounds Kirby cucumbers, cut crosswise into 1/4 inch rounds (about 8 cups) (We used the small cucumbers from the garden, about 4-6 inches long.)
  • 2 cups thinly sliced red onions (We used a combination of red and yellow.)
  • 1/3 cup pickling salt
  • 2 cups apple cider vinegar
  • 1 1/4 cups (packed) light brown sugar
  • 1 tablespoon grated peeled fresh ginger
  • 1 tablespoon turmeric
  • 1 tablespoon yellow mustard seeds
  • 1 1/2 teaspoons coriander seeds
  • 1 teaspoon celery seeds
  • 2 Fresno chilies or red jalapeรฑos, pricked with a toothpick (We used green because no red was available. We also cut them into thick slices.)

Making Bread & Butter Pickles-4.jpg
The cucumbers, onions and salt are ready for the refrigerator.

PREPARATION
  • Toss together cucumbers, onions, and salt in a large bowl. Add 3 cups ice; set aside for 2 hours. Drain; rinse well and drain again.

  • Combine vinegar and the remaining ingredients with 1 cup water in a large pot; bring to a boil, stirring to dissolve sugar. Add cucumbers and onions; return to a boil.

  • Ladle hot vegetables and pickling liquid into 2 clean, hot 1-quart jars, dividing equally. Press vegetables to completely submerge in liquid, leaving 1/2 inch space on top. Wipe rims, seal, and process in a boiling water bath for 10 minutes.

Making Bread & Butter Pickles-5.jpg
After several hours, I drained and rinsed the mixture.

Hungry for More? If you have a question about this recipe, contact our Test Kitchen at askba@bonappetit.com. To see more recipes like this one, check out our Summer Sides Slideshow.

    • NUTRITIONAL INFORMATION

      1 tablespoon contains:
      Calories (kcal) 19.4
      %Calories from Fat 0.0
      Fat (g) 0.0
      Saturated Fat (g) 0.0
      Cholesterol (mg) 0.0
      Carbohydrates (g) 4.4
      Dietary Fiber (g) 0.4
      Total Sugars (g) 3.5
      Net Carbs (g) 4.0
      Protein (g) 0.2
      Sodium (mg) 60.9

    Making Bread & Butter Pickles-7.jpg
    The sterilized pint jars.

    Making Bread & Butter Pickles-8.jpg
    The lids waited in a hot water bath.

    Making Bread & Butter Pickles-9.jpg
    The first jar is filled.

    Making Bread & Butter Pickles 9A-1.jpg
    Seven pints are put into the hot water bath.

    Making Bread & Butter Pickles-10.jpg
    The jars have to be covered with boiling water in the canner.

    Making Bread & Butter Pickles-12.jpg
    The pickles!

    PRINT THIS RECIPE

    _/\_/\_

    Monday, August 08, 2011

    Proud Parents

    Guess Who Stole Pansy's Mouse--5.jpg
    Pansy brings her mouse to us in the house.

    I think John and I are too permissive, indulgent, complacent — whatever you want to call it —  about the cats. I find that not many other people understand stories like this.

    Pansy caught her first mouse in New Hampshire two years ago and since then we have no documentation that she ever caught one again. But she got one on July 10. I was leaving the house out the back door, which is always open during daylight for the cats, with my camera, as Pansy was trying to come in with her kill. Pansy hates my guts, so she wouldn't enter while I was there. I took advantage of this to photograph her and then stepped aside to let her in.

    Guess Who Stole Pansy's Mouse--6.jpg
    Under the kitchen table.

    Pansy ran to the kitchen and dropped her dead mouse under the table. She doesn't eat her mice. She just drops them and guards them. But Oscar was not going to let an old lady's spitting deter him. He began to bat the mouse about on the floor when Pansy hissed at him. Oscar challenged her authority and she relented and let him have it.

    Guess Who Stole Pansy's Mouse--10.jpg
    Spitting Pansy.

    Now it was Oscar's turn to be ferocious. He growled and postured as he took possession of the mouse.

    July 10 was a Sunday — pancake breakfast day — so I began cooking.as Oscar was tossing the mouse about the kitchen and dining room. A friend, R, dropped in then. Since we were going to have breakfast, I invited him to join us and he accepted. He sat down and began watching Oscar tossing his dead, mangled mouse about. John and I, realizing this may be an odd breakfast activity, explained to R that Oscar was learning to hunt, getting a good taste for mice, and we were very proud. An odd expression came over R’s face, but he ate plenty of pancakes, sausages and coffee.

    Guess Who Stole Pansy's Mouse--16.jpg
    Growling Oscar

    After breakfast, I cleaned the kitchen while R and John talked at the table. It had been over an hour since Oscar took the mouse from Pansy but he was still tossing it high in the air and leaping about the kitchen. Soon Oscar became quiet, so I went to see what he was up to (quiet kittens, like quiet children, need to be checked on). Oscar was crouched in the dining room — eating the mouse. In fact, he had eaten the entire head and shoulders. How proud I was of him! I called out to the men at the table, and John, equally proud, interrupted his conversation to watch Oscar. Our boy was going to be a great hunter!

    R had to leave then. Oscar ate the entire mouse except for the read end and tail. R has not returned for another breakfast.

    _/\_/\_

    Thursday, April 07, 2011

    How to Wreck Your Applesauce

    Coxeter's Pippin Experiment (1 of 3).jpg
    Two experimental apples — A and B.

    Do you remember Coxeter's Pippin? If not, please click that link and go read it. A geometry professor claimed that coring an apple his way was the most efficient way to core apples. His claim has been nagging me for days now, so yesterday, while making applesauce, I decided to test his theory.

    I had 8 apples for the applesauce and selected two that were most identical in size. I weighed each on my digital food scale after I peeled them. Then I cut both of them equatorially (see the photo in the link of the original post above). For Apple A, I used Coxeter's method for coring. For Apple B, I used my husband's coring method (which, if you remember, he had taught me before I learned Coxeter's method). Suddenly, I wanted to see how much waste was produced with my own method, so I selected another apple, Apple C. I didn't care what size Apple C was. By this time. I just wanted to get this damn experiment over with and have supper. My method for coring apples is traditional: I cut the apple in half longitudinally and then, using a sharp knife, I cut the core out along with my own skin, nail and sometimes bone, creating a lot of blood. I weighed the stuff that I cut out of each apple and created a chart (below). Then I calculated the percent loss of each apple. If you would check my math I would appreciate it. I was grouchy when I did the numbers this morning, so I probably made a mistake.

    Coxeter's Pippin Experiment (2 of 3).jpg
    The debris from the Coxeter Pippin Method.

    Apple
    Method
    Apple A
    Coxeter Pippin
    Apple B
    John's Method
    Apple C
    traditional

    Peeled Weight

    3.625 oz. 3.5 oz. 3.625 oz.

    Cored Weight

    3.25 oz. 2.50 oz. 2.125 oz.

    Percent Loss

    10.3% 28.5% 41.3%

    Discussion

    The Coxeter Pippin Method resulted in the least waste, therefore it was most efficient. But I didn't like it. It was tedious and time consuming. I had to dig those little skin-like things out of the apple because they did not "fall out" as Coxeter said they would. My back was killing me as I huddled over the pieces of apple. My method was most familiar so I was able to think of other things besides apples and even hum my cooking song. John’s method was comfortable and somewhat enjoyable because I knew I could become expert at it if I tried it enough. It went fairly quickly, too, but not as quickly as my method.

    Conclusion

    • I am going to continue using my method for coring apples.
    • Don’t pay attention to cooking advice from geometry professors.
    • Don’t use maple sugar in your applesauce. It tasted awful.

    _/\_/\_

    Saturday, April 02, 2011

    Puzzling Week Returns: Coxeter's Pippin

    Apples (1 of 4).jpg
    Peeled & equatorially cut apples ready to be cored for making apple slab.
    January 24, 2011

    John and I peel dozens of apples for pie, sauce, and slab. Depending on the size and quality of the apples, we will either peel and core by hand (with or without a corer) or by crank. John recently taught me that cutting apples equatorially and then coring them takes less time then the traditional cutting and coring. I have often wondered if there was an even easier or better way than all of the methods we have tried. I found a way tonight! But this is a puzzle. Your clue is the photo I took (above) of equatorially cut apples from January when I made two huge slabs for the weekend. By the way, I no longer use the King Arthur slab recipe. I double a pie crust recipe for a double 9” pie, use a 13x9 Pyrex pan, and just make an apple pie (butter, flour, brown sugar, cinnamon, nutmeg, ginger, cloves are all measured by feel and sight) in the rectangular Pyrex.

    New Scientist Magazine December 21, 1961

    There are many ways of eating an apple. At one extreme is the child who met the request, "Can I have the core of your apple?" with a flat, "There ain't going to be no core!". Various procedures with various implements are designed to remove the core, but probably not one apple in a million is cored in the most efficient fashion possible. How in fact should an apple be cored, to remove all the core with the least possible waste?

    Spoiler Alert! The answer is the first comment to this post.

    _/\_/\_

    Friday, November 05, 2010

    Chokecherries

    Chokecherry (5)

    Prunus virginiana

    We have dozens of chokecherry trees in the woods and fields; even by the road. They ripen at the end of July and during August. That is, I found, the best birding time. As I learned to photograph birds outdoors, I would loiter at the chokecherry trees as the birds ate breakfast.

    Song sparrow (3)

    Above and below: a song sparrow (Melospiza melodia) hidden in the chokecherry tree.

    Song sparrow (2)
    Nashville Warbler (1)

    Abovce and below: a Nashville warbler (Vermivora ruficapilla) hidden in a tree.

    Nashville Warbler


    Below is a photograph of the chokecherry blossoms from the spring.

    Wild Cherry - 5

    When the cherries were ripe  enough to pick, Nate, the kids and I picked five gallons of them for jelly. It is easy to pick them — you just start at the top of the bunch and pull them down with your hand. The problem is the high branches. I used a metal garden rake to gently bring the branches down so that we could reach them. Another problem was bears.

    Bear scat in apple orchard (1)

    Bears love chokecherries and there was evidence of them everywhere under the trees. They had broken branches and flattened the grasses. And pooped. Everywhere we went there was bear poop (see above)!

    Wild Granny Smith apples in the orchard

    Above, you can see the granny smith apples from the apple orchard. They were almost ripe in August. We made plans to pick them, also, as soon as they were ready.

    And the chokecherry jelly? John and I forgot to follow the directions for our altitude. The jelly jelled in the pot but did not jell in the jars. We are going to re-cook it as soon as we can. I found a great article on chokecherries that you should read if you want to harvest them (click here). There are lots of other things you can do with chokecherries besides jelly.


    _/\_/\_

    Saturday, May 08, 2010

    Rhubarb Crisp

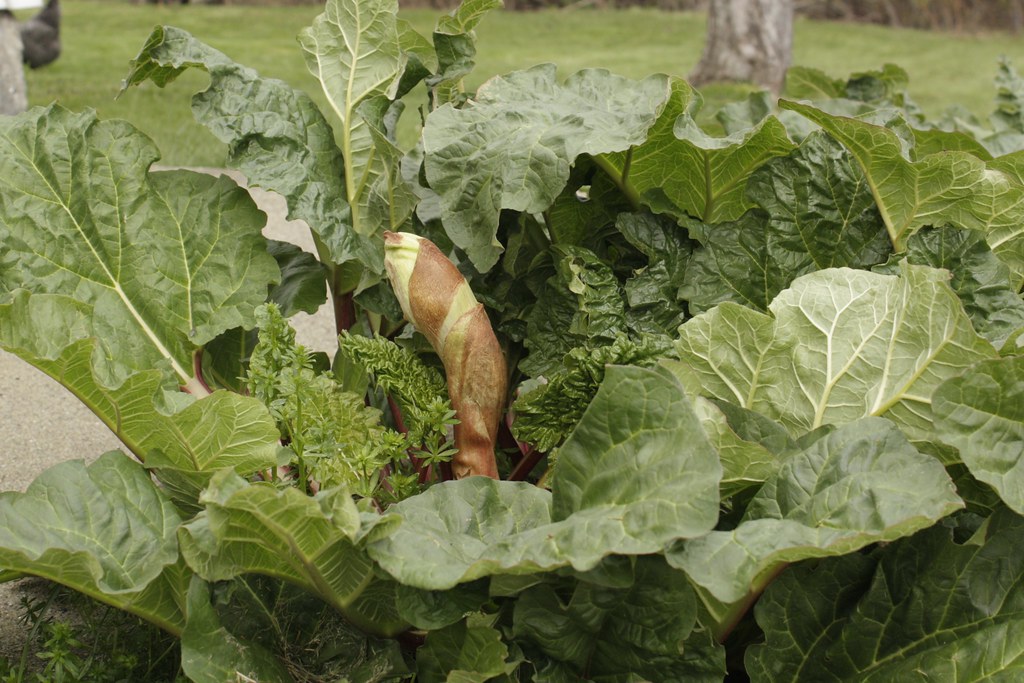
    My two Canadian rhubarb plants are doing great. Each one has three seed heads (the photo above), so in the fall we will divide them and get six rhubarb plants! John also found some growing on the slope behind the clothesline. They are new, we never saw them there before. So that makes nine rhubarbs!

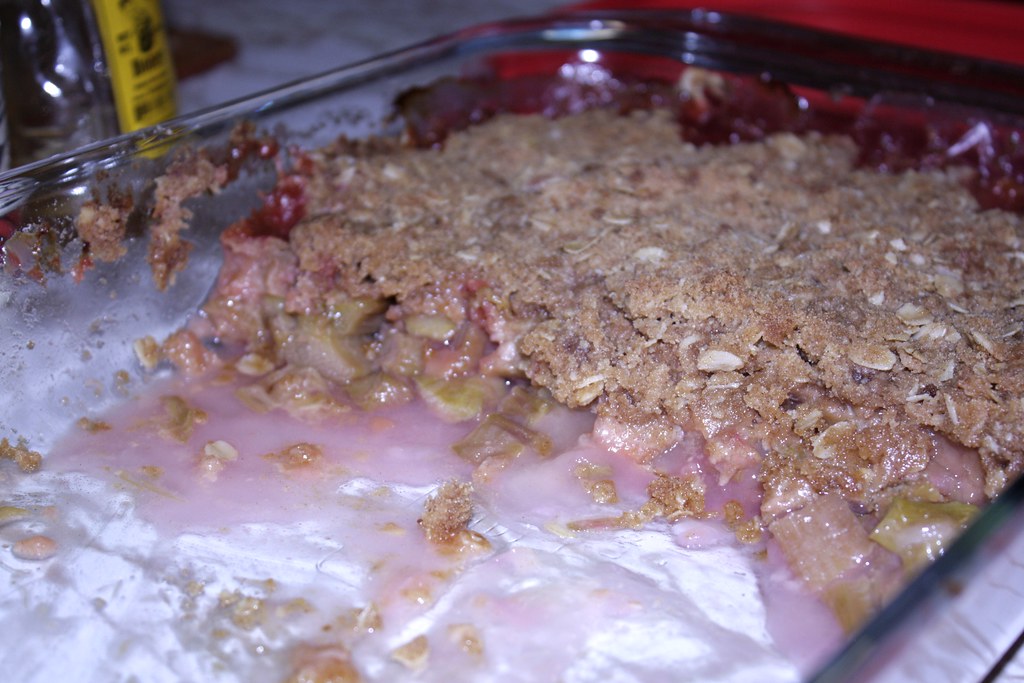
    Amelia finally made her rhubarb crisp, so here's the recipe:
    Filling
    2 1/2 lbs rhubarb
    1/2 cup + 2 T sugar
    3 T flour

    Topping
    1/4 c walnuts
    1/4 c real oats
    1/4 t cinnamon
    3/4 c flour
    1/3 c light brown sugar
    1 T sugar
    4 T unsalted butter

    Oven: 400°
    Put pan in center of oven
    Note: we doubled the topping
    Enjoy it!
    diigo it
    _/\_/\_