Showing posts with label gardens. Show all posts

Monday, August 22, 2011

[Cross-Post] Making Pickles

Making Bread & Butter Pickles-2.jpg

We have dozens of wonderful cucumbers from the garden this summer. John made 6 pints of relish (the recipe will come later), and today we made pickles. The photos are my own from when we made the pickles using this recipe. The recipe can be found at http://www.bonappetit.com/recipes/2011/08/bread-and-butter-pickles. We tasted the pickle juice after we finished canning the pickles. It was wonderful, with a great “bite.” We can’t taste the pickles for one week.This post is from my recipe blog: http://meeyauw-recipes.blogspot.com/2011/08/bon-appetit-bread-and-butter-pickles.html. All text in italics is mine. Non-italic text is copied from the Bon Appetite post. We doubled the recipe and used pint jars. This was a great day — John and I cooked together while violent thunderstorms raged outside!

These old-school sandwich pickles strike the perfect sweet-sour balance.

MAKES ABOUT 2 QUARTS

RECIPE BY Kevin West

AUGUST 2011

Making Bread & Butter Pickles-3.jpg
John has made a knife that uniformly cuts 1/4 inch slices,
which was perfect for the cucumbers.

INGREDIENTS
  • 2 1/2 pounds Kirby cucumbers, cut crosswise into 1/4 inch rounds (about 8 cups) (We used the small cucumbers from the garden, about 4-6 inches long.)
  • 2 cups thinly sliced red onions (We used a combination of red and yellow.)
  • 1/3 cup pickling salt
  • 2 cups apple cider vinegar
  • 1 1/4 cups (packed) light brown sugar
  • 1 tablespoon grated peeled fresh ginger
  • 1 tablespoon turmeric
  • 1 tablespoon yellow mustard seeds
  • 1 1/2 teaspoons coriander seeds
  • 1 teaspoon celery seeds
  • 2 Fresno chilies or red jalapeños, pricked with a toothpick (We used green because no red was available. We also cut them into thick slices.)

Making Bread & Butter Pickles-4.jpg
The cucumbers, onions and salt are ready for the refrigerator.

PREPARATION
  • Toss together cucumbers, onions, and salt in a large bowl. Add 3 cups ice; set aside for 2 hours. Drain; rinse well and drain again.

  • Combine vinegar and the remaining ingredients with 1 cup water in a large pot; bring to a boil, stirring to dissolve sugar. Add cucumbers and onions; return to a boil.

  • Ladle hot vegetables and pickling liquid into 2 clean, hot 1-quart jars, dividing equally. Press vegetables to completely submerge in liquid, leaving 1/2 inch space on top. Wipe rims, seal, and process in a boiling water bath for 10 minutes.

Making Bread & Butter Pickles-5.jpg
After several hours, I drained and rinsed the mixture.

Hungry for More? If you have a question about this recipe, contact our Test Kitchen at askba@bonappetit.com. To see more recipes like this one, check out our Summer Sides Slideshow.

    • NUTRITIONAL INFORMATION

      1 tablespoon contains:
      Calories (kcal) 19.4
      %Calories from Fat 0.0
      Fat (g) 0.0
      Saturated Fat (g) 0.0
      Cholesterol (mg) 0.0
      Carbohydrates (g) 4.4
      Dietary Fiber (g) 0.4
      Total Sugars (g) 3.5
      Net Carbs (g) 4.0
      Protein (g) 0.2
      Sodium (mg) 60.9

    Making Bread & Butter Pickles-7.jpg
    The sterilized pint jars.

    Making Bread & Butter Pickles-8.jpg
    The lids waited in a hot water bath.

    Making Bread & Butter Pickles-9.jpg
    The first jar is filled.

    Making Bread & Butter Pickles 9A-1.jpg
    Seven pints are put into the hot water bath.

    Making Bread & Butter Pickles-10.jpg
    The jars have to be covered with boiling water in the canner.

    Making Bread & Butter Pickles-12.jpg
    The pickles!

    PRINT THIS RECIPE

    _/\_/\_

    Saturday, July 09, 2011

    Buddy in the Nip

    Buddy is Stoned-17.jpg

    Occasionally I go out and weed the flower gardens and Buddy, as always, comes with me. He loves to work in the garden with me because there are three catnip plants that he especially cares for. He can lie in the middle of all three plants and enjoy himself until he passes out and sleeps for hours. Buddy's addiction is so bad that when he gets up and goes out in the morning, he often runs directly to the nip for a morning jolt.

    Buddy is Stoned-25.jpg

    Because the 'nip is at the far end of the garden, the other cats haven't found it yet. My feeling is that Buddy isn't into sharing the location with them, either.

    Buddy is Stoned-27.jpg

    Buddy is Stoned-28.jpg

    Buddy is Stoned-34.jpg

    I think I will have to cut, dry, and process the catnip for Buddy’s wintertime pleasure!

    _/\_/\_

    Sunday, June 19, 2011

    Invasive Honeysuckle

    Tartarian Honeysuckle (Bush honeysuckle) (Lonicera tatarica L.)-4.jpg
    Tartarian Honeysuckle (Bush honeysuckle) (Lonicera tatarica L.)

    While clearing the hillside above the brook near the house, John found a very large honeysuckle bush. The State of Vermont lists five species of honeysuckle here that are invasive. Four of the five are under quarantine (The quarantine makes it illegal to buy, sell, transport, cultivate, etc. the plants on the list. There are two parts of the list: Class A and Class B species. Class A plants are exotic species that are currently on the Federal Noxious Weed List and are not known to occur in Vermont. The movement, importation, sale, possession, cultivation, and/or distribution of these plants are prohibited. Class B species are exotic plants that are known to occur in Vermont and are considered to pose a serious threat to the State. The movement, sale and/or distribution of these plants are prohibited.). Source: http://www.vtinvasiveplants…..

    Considering the alarming information about these honeysuckles, I set out to identify ours. Think that would be easy? No. The state has awful photographs and generic descriptions, as do other resources. When we found good photos at the University of California, the descriptions either did not match or could describe another species. I noticed in my Vermont research that the Nature Conservancy is involved with invasives in the state, so I e-mailed the Vermont co-chair of the Vermont Nature Conservancy. And finally, I had some real answers. Sort of:

    Andree, thanks for contacting me about this, and I’m sorry you’ve had a frustrating time using the website. We’ve stopped maintaining it because in a few weeks we’ll have a new, very updated site online. As far as your honeysuckle goes, clip a small branch and look at the middle of the stem at the cut end. If the middle is white, it is one of our native honeysuckles. If the middle is brown or hollow, it is one of our two invasive shrub honeysuckles, Morrow’s or Tatarian honeysuckle.

    The state’s deep financial shortfalls may have prevented them from hiring a purple loosestrife control specialist, usually a summer-long position.

    Unfortunately, she failed to tell me the species that are native and where they can be found. I have spoken to professional nursery owners here who did not even know that there are native honeysuckles. But at least we have an easy test for native/non-native honeysuckle. Click here to see a photograph of the hollow invasive honeysuckle stem.

    Tartarian Honeysuckle (Bush honeysuckle) (Lonicera tatarica L.)-6.jpg
    Yellow flowers were pink but turn yellow when they have gone by.

    We found that our honeysuckle is invasive. This brought up a whole new problem: do we eradicate or not? We have decided not too. In our entire two lives, we have never seen any honeysuckle in any forest. While birds and mammals may spread the seeds from this shrub to other areas, we haven't seen any except behind the library downtown in Barton. The bush we have is huge; it is about 15 feet tall and 6 feet wide. It is on a steep hillside. We are still weighing our options, though. This entire episode has brought up a deep division of philosophy about invasives. When are they no longer invasives? I have serious problems about the request that Vermont makes of us to report invasives. I reported the rapid spread of loosestrife in the bog last summer. Nothing happened, so I began eradication. Loosestrife is more of a menace than honeysuckle, as is Japanese knotweed (here and here). I have not seen Vermont take any action to eradicate these invasives except to tell us to do it.  What do you think about this invasive controversy?

    _/\_/\_

    Thursday, June 16, 2011

    Thirsty Buddy

    Thirsty Buddy-3.jpg

    Buddy and I were walking around the back inspecting the new gardens and the revived brook. It was very hot and Buddy was thirsty. I expected him to just lean over and drink from the brook, but he walked in. At times his ears went back in distaste of the cold water, but he didn't stop walking through it. In fact, Buddy walked down the brook to the bridge that John built over it and then explored under the bridge. In these photographs, I like the looks of his little white feet in the water.

    Thirsty Buddy-13.jpg

    Thirsty Buddy-17.jpg

    Today we went to a Labour of Love Gardens in Glover and found Siberian Irises to plant on the banks of the brook to complete the restoration. Next summer the brook will be more beautiful than ever. When you are in Glover, you have to stop by the gardens. She has plants that are difficult to find and her prices are reasonable. She also has the largest collection in Vermont of sempervivum (plants like hens and chicks).

    _/\_/\_

    Monday, May 30, 2011

    Moving the Rhubarb

    New rhubarb bed-2.jpg
    The new rhubarb bed.

    Years ago, I found a beautiful Canadian red rhubarb that I love. I had two plants but I never divided them. They were huge. They provided a lot of rhubarb and photographs. One summer, Wingnut and I wouldn't cut the rhubarb because it housed a huge aphid farm for ants. We followed the life of the farm until it suddenly simply stopped existing. But this year, we had to divide the rhubarbs. They were simply too big.

    Moving the Rhubarb-2.jpg
    Rhubarb after it was dug up with the tractor.

    The rhubarb plants had to be dug out by the backhoe on the tractor. It had to be done carefully so that the plant wasn't damaged. I was stunned to see the size of the roots. Each carrot-like root is a plant, but we couldn't even count how many there were, so we divided the rhubarb into four plants.

    Moving the Rhubarb-7.jpg
    The huge rhubarb roots.

    Last summer the new septic system was installed, with an access that sticks out of the ground. I had planned on a wreath of rhubarb around the cap, but John built a raised bed with a stone wall in a semicircle around the cap.

    Moving the Rhubarb-13.jpg
    Preparing the new bed for the divided rhubarb.

    John had already moved a rhubarb we had found growing behind the house that I never knew was there. We don't know where it came from. But it is flourishing in front now. John used the backhoe to dig holes for each of the four new plants that we divided.

    Moving the Rhubarb-15.jpg
    Planting one of the four rhubarbs divided from the one plant.

    Even after using the backhoe, we weren't sure if we had planted them deep enough, .But now, two weeks later, the plants are producing more stalks and are growing huge once again. We have to finish the project with the other red rhubarb. There is also one green rhubarb that I want Amelia to take home. And friend Barb has given me a pink rhubarb. In return, she desires one of my divided red plants. In the end, we will have at least 9 rhubarb plants out front. Now we think we have to make another rhubarb bed because they are growing so large!

    Moving the Rhubarb-25.jpg
    Planted and watered.

    _/\_/\_

    Thursday, April 21, 2011

    Sign of Spring: Rhubarb Is Up!

    Rhubarb is Up!!! (4 of 6).jpg

    This is what the rhubarb looked like thirteen days ago. It is maybe a half inch taller now. If it would ever warm up and stop snowing, we would move it to the new septic tank access port. That is the green thing that is sticking out of the front yard. If we move all of the rhubarb there, it will look very attractive. The rhubarb plants all need to be separated, anyhow, so we can do both chores at the same time. I hope we can do it soon. We are both itching to dig and plant outside.

    Today is the day that I chose for the Crystal Lake ice out. People win a lot of money in those raffles and I was absolutely certain that today (or even this week) would be the day.  In 2007 ice out was on April 22 at 4:55 PM (source: Vermont Weather Blog, ice out page). There is no way that ice out will happen tomorrow. It is now 30°F (-1°C) and snowing. The weather report says we will get about an inch of snow.

    _/\_/\_

    Sunday, September 19, 2010

    My Onion Part 3

    July 2010

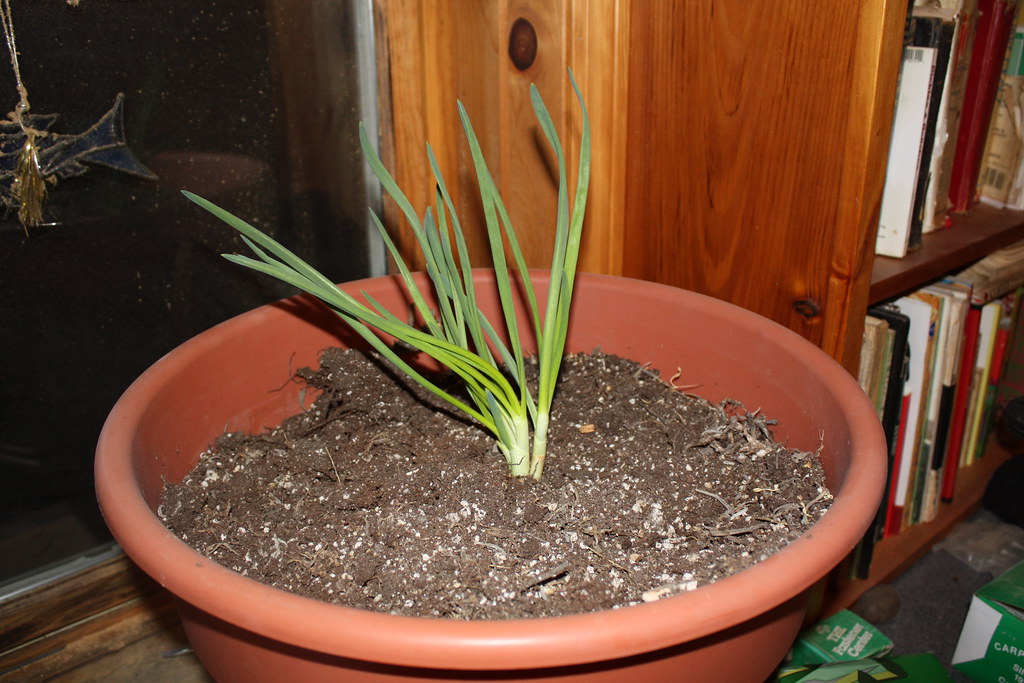
    Way back I planted an ordinary yellow onion in a pot to see what would happen to it. I posted about it here, where it looked like this when I potted it:

    December 2009

    I posted about my onion again after it had grown a bit and looked like this:

    February 2010
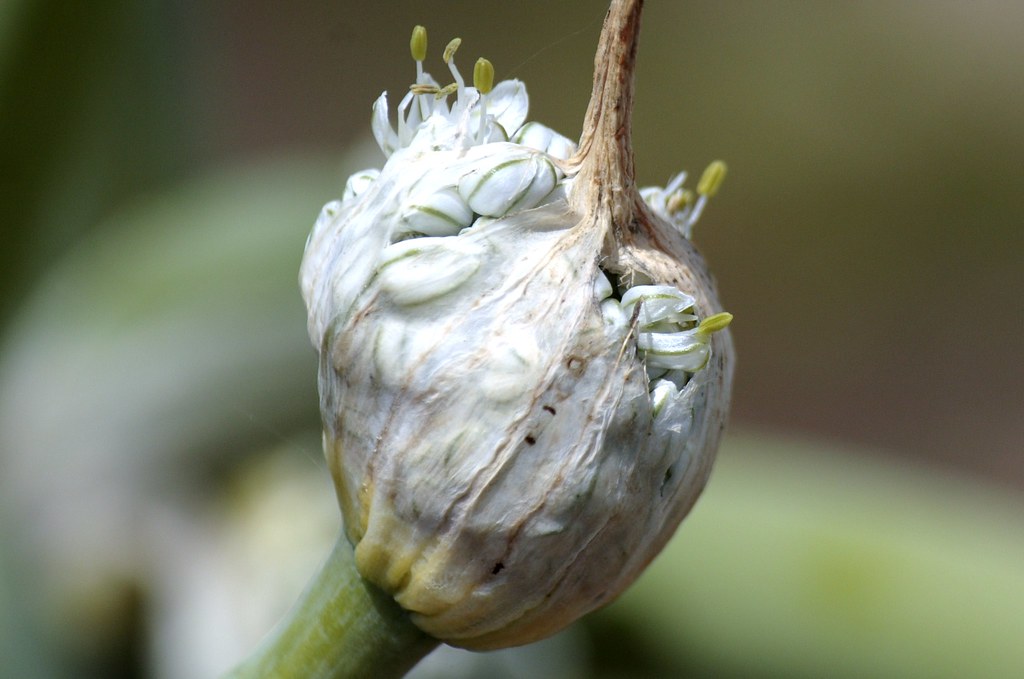
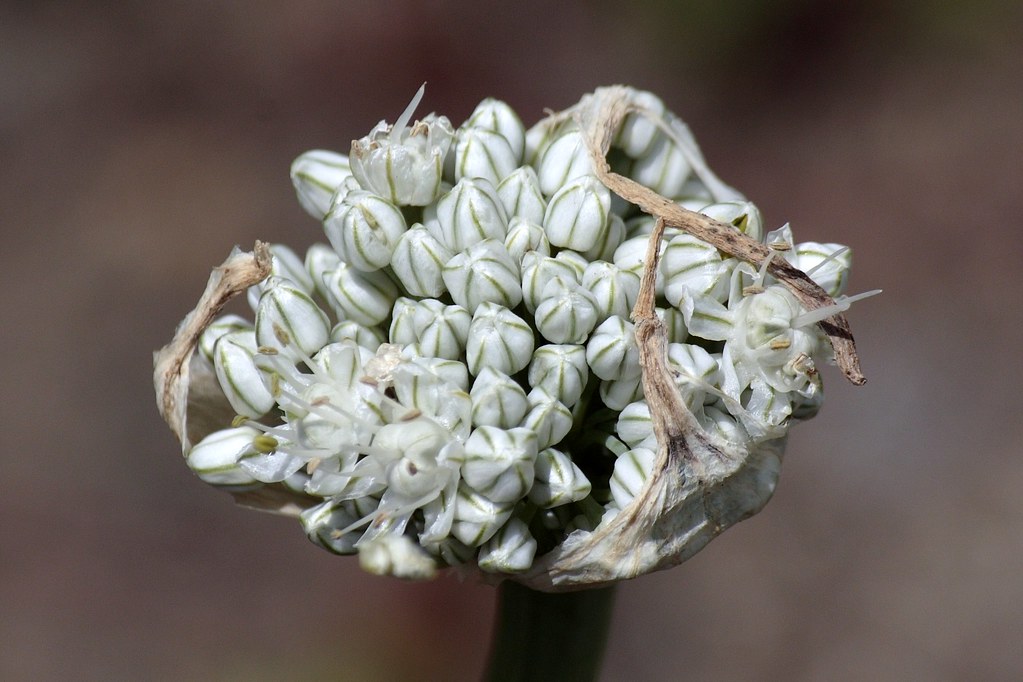
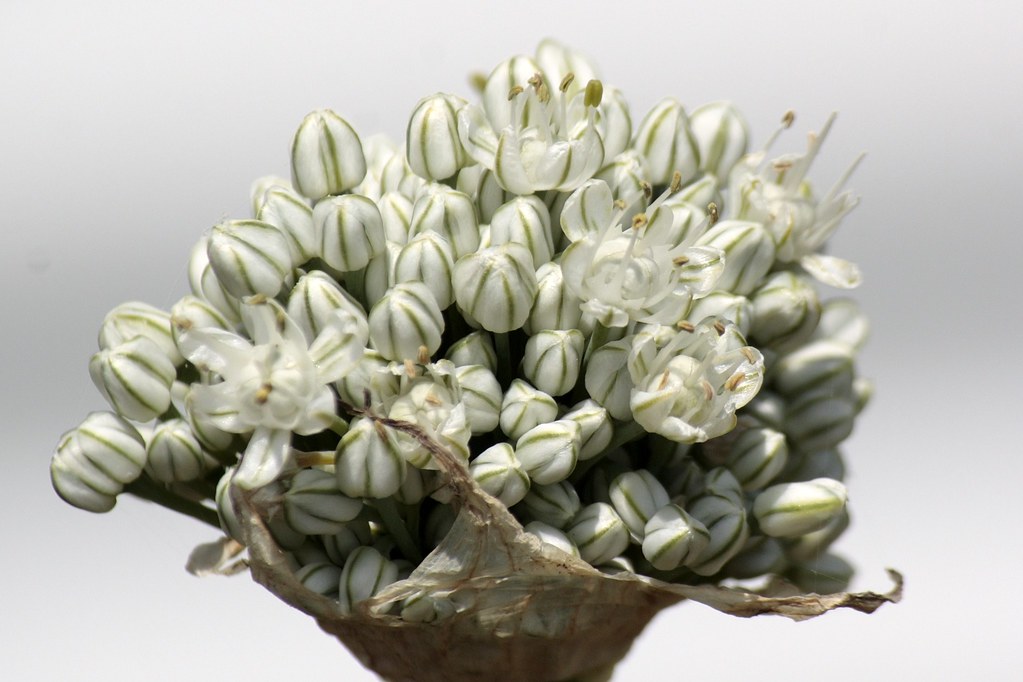
     You can see that it is now huge! I was thrilled to see the flowers on it. But the flower head was covered with a papery skin, just like the onions are. As the flower inside the skin grew, it finally burst the skin and emerged, as you can see in the photos below:

    A "bud" covered emerging from its papery skin.
    The buds are free of their wrapper now.
    The lovely, onion smelling flower has now bloomed.
     I have a photograph of a lovely moth on this flower, but I can't find the photo yet. I will as I continue to get caught up on editing photographs. The flowers are dying back now because of the frosty nights. Eventually I will dig up the original onion to see what happened to it. Try this yourself, but make sure you have a huge pot!
    _/\_/\_

    Sunday, February 21, 2010

    My Onion

    I planted my sprouted yellow onion a week or so ago. It's growing just great but there is no sign of a flower forming. Updates will follow.

    diigo it
    _/\_/\_

    Tuesday, February 16, 2010

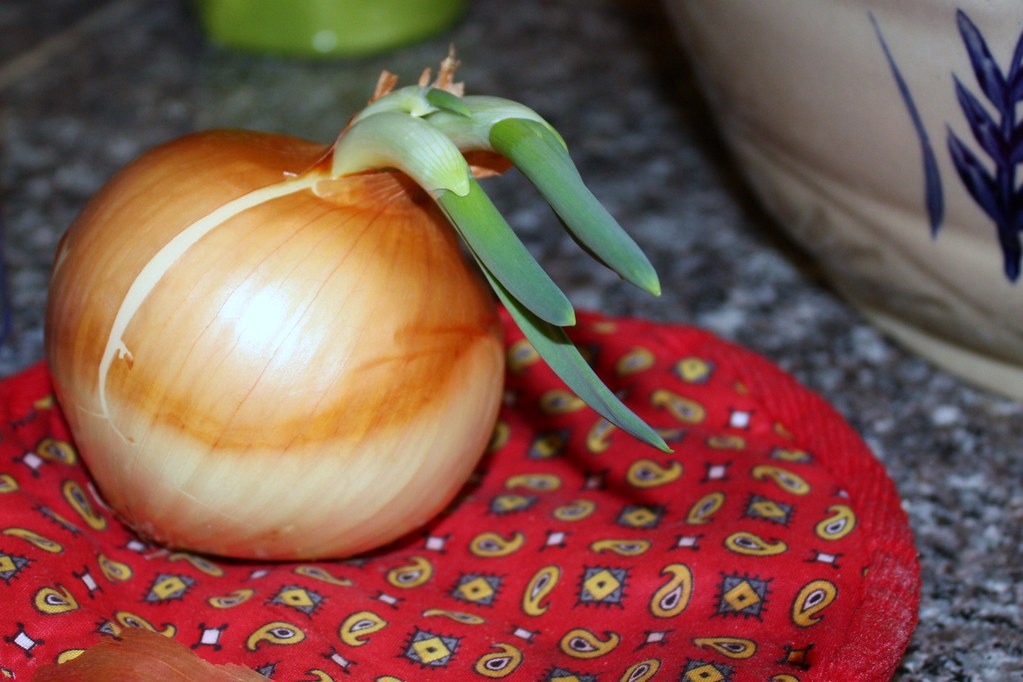
    A Sprouting Onion

    One of our onions sprouted so I have planted it in a pot to see what happens. In December I tried turnip tops but turnip tops stink and I threw them away. This kitchen garden thing is fun — we bought a pineapple this week and will try to grow that next.

    diigo it

    _/\_/\_

    Thursday, July 02, 2009

    My Lupine


    Lupine at Home - 1 on Flickr - Photo Sharing!

    Not my lupine of course. But it is here and still blooming. All colors. It's been raining too much for me to go photograph the other colors, but I will. I planted lupine seeds that John has saved and they are coming up! They won't be blooming this year — they will begin to bloom next year
    Lupine Set

    _/\_/\_

    Friday, June 26, 2009

    Pansies

    John and I spent a lot of time and money finding my pansies for this year's garden. We couldn't find any in New Hampshire at all and I thought I'd have to import them from Vermont. But the next weekend, a nursery in New London had hundreds of them. I picked out my favorite colors, we planted them, and sat back to enjoy their beauty.
    But the woodchuck enjoyed them first.
    _/\_/\_

    Saturday, July 05, 2008

    The School Garden: Week 2: What's Growing

    Three little peppers.

    Peas.

    Tomatoes.

    Squash.

    Please click here to see what we learned about gardens last week.
    Please click here to see other macros taken in the garden.

    _/\_/\_

    The School Garden: Week 2: What We Learned

    Wednesday, July 2: First we have to do the weeding. Here, Wingnut is hilling the beans.

    We learned about the activity in the compost pile and what compost is for.

    Earthworms are now living in the compost. They help to break down the things in the compost and create new earth.

    Above you see the new dirt that has been created.

    We had to break off the garlic scapes so that the garlic bulbs can grow large. We took home two scapes to cook. You can use them just as you would use garlic.

    We spread hay around the melons and squashes so that weeds would not grow and moisture would stay in the ground.

    We read Tops and Bottoms to learn about plants in the garden. Then we completed a worksheet.

    Somebody was saving the red clover blossoms that were pulled out as "weeds."


    These are the beans that Wingnut planted last week.

    And of course, every gardener updates his garden journal at the end of the chores.

    _/\_/\_